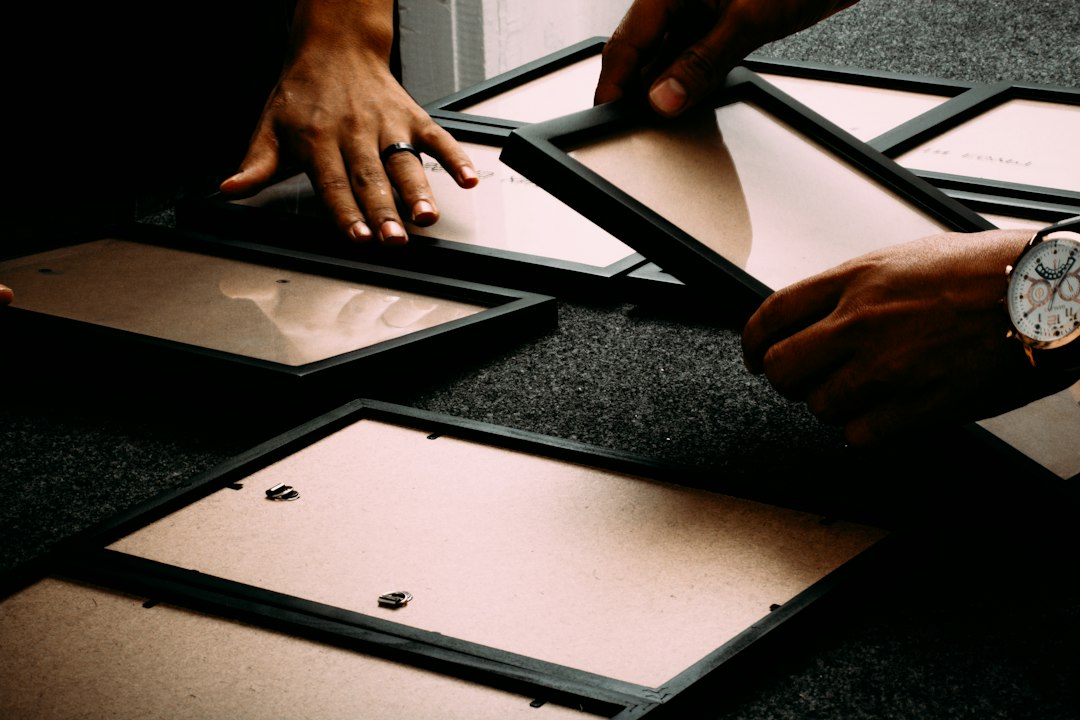
This guide uses art conservation methods as the starting point for the practical advice below. Art conservation methods form a bridge between scholarship, materials science, craft, and patient decision-making. If you are a student, a studio professional, or a museum colleague, this practical guide gathers field-tested routines and plain-language explanations so you can plan, document, and carry out work that respects both artworks and audiences. Rather than a single recipe, the focus here is a toolkit you can adapt: intake to condition reports, small-scale cleaning tests, stabilization, environment, storage, lighting, transport, and digital record-keeping.
art conservation methods: Art conservation methods: core principles and ethics
Conservation begins with values, not materials. The first principle is minimal intervention: do as little as necessary to secure the work’s physical and aesthetic integrity, and no more. The second principle is reversibility where practical: favor choices that can be undone later without introducing new vulnerabilities. The third principle is legibility: your work should not pretend to be the artist’s; it should support the audience’s understanding without obscuring original texture, tool marks, or patina. The fourth principle is documentation: if it is not written, photographed, and filed, it effectively did not happen.
Ethics have a daily-life shape. A quick fix might make a photograph or painting look ready for a gala opening, but tomorrow’s conservator could pay the price. By pausing for testing, seeking peer input, and recording rationale, you reduce the odds of introducing irreversible change. Many studios create an ethics checklist they revisit at project milestones: have we consulted the owner or artist? are proposed steps the least intrusive that meet the goal? are we honest about uncertainty and alternatives?
Stakeholders matter. Artists and estates may have strong views about surfaces, aging, and even acceptable replacements. Lenders and insurers have risk tolerance thresholds. Curators and educators balance scholarly intent with visitor experience. For living artists, a brief interview about materials and desired aging can save months of guesswork; for historical works, provenance, past repairs, and exhibition histories are your clues. A principled approach to art conservation methods keeps these human relationships visible alongside lab measurements and techniques.
The conservation workflow: intake to reinstallation
A reliable workflow does not eliminate uncertainty, but it keeps it orderly. Think in phases: intake and triage, condition reporting, testing, proposal, implementation, and review. Intake captures identity, origin, owner, and a high-level condition snapshot. Triage screens for hazards: friable charcoal, flaking paint, unstable supports, moldy mounts, active pests, or failing adhesives. If a piece is unsafe to handle, pause and stabilize before proceeding.
Condition reporting follows (covered next), and with it, testing. Micro-tests and mockups help you avoid surprises. For example, you might test dry cleaning on a margin before touching a printed image area; or trial a facing tissue on a delicate paint layer to see how it releases. Document all tests, even the ones you abandon; future you will be grateful. A proposal distills findings and options for decision-makers. It outlines tasks, risks, timelines, and budgets. When implementation begins, you proceed from the least intrusive steps (surface dust removal) to the more consequential (adhesive reactivation, consolidation, inpainting). Finally, review: take after photographs, update metadata, file your documentation, and schedule follow-up checks if needed.
Workflows profit from visible boards and checklists. A wall chart showing items in queue, current phase, responsible person, and next step reduces error. Many teams add a weekly stand-up to review roadblocks, distribute tasks, and log what changed. A simple pulse metric—such as a green-yellow-red tag—alerts colleagues to fragile or active works. Even small studios benefit from these habits: they create calm, signal priorities, and make it easier to welcome interns and visitors without jeopardizing in-progress work.
Condition reporting: language, notation, and photography
Condition reports are the backbone of conservation. When a work arrives, you write the object’s identification, materials (if known), dimensions, inscriptions, and an overall statement of condition in neutral language. Avoid judgments like “excellent” or “poor”; instead, describe what you observe: scuffs at edges, abrasion on raised impasto, waviness along the lower stretcher bar, tape residue on verso, or foxing in margins. Agree on standard terms with your team to keep reports consistent, and train newcomers in that vocabulary so one person’s “warp” is not another person’s “cup” or “twist.”
Diagrams help. Create a simple outline drawing—front and back—on which you place symbols for issues (e.g., triangles for tears, dots for losses, hatched areas for abrasion). If you photograph before unframing, note it, because frames and glazing can hide issues. Standardize photo angles, color charts, and scale references. Use diffuse, even light to avoid glare that misleads the viewer, and set white balance consistently across shoots. Capture both overall views and detail shots; label files immediately to avoid orphan images later.
A practical habit is to draft while you inspect. Speak observations aloud and capture them in a voice note if your hands are occupied. Back at your desk, transcribe, check for neutral tone, and add images. Reports are living documents: if you discover a new inscription after surface cleaning, append an addendum rather than rewriting history. In loan situations, match your report to lender templates if required, but keep a full version for your institutional records. Clear condition reporting reduces disputes and protects reputations.
Material literacy: supports, binders, grounds, and modern media
Knowing what you are touching changes what you do. Paper varies wildly—rag, wood pulp, coated, laminated—and so does canvas (linen vs. cotton), board (MDF vs. archival mount), or plastics (acrylic vs. PVC). Binders and grounds add more layers: oil, acrylic, casein, shellac, gesso variants, and fillers. Pigments range from lightfast minerals to fugitive organics; inks include carbon, dye-based, and pigmented formulations. Contemporary art complicates the mix with collage, tape, solvent-based spray, epoxy layers, and found materials that behave unpredictably over time.
Each material system hints at risks. Oil paint on a brittle ground can craze and flake; acrylic paint attracts dust and blocks with plastic sheeting; newsprint yellows and embrittles; PVC releases plasticizers that migrate. Before touching anything, learn the common failure modes for the family of objects in front of you. Build a materials notebook or digital wiki with snapshots, supplier notes, and your own lab tests. Keep samples of substrates and adhesives to test independently without risking an artwork.
Modern media such as video, software, or interactive pieces require a broader definition of material literacy. Hardware obsolescence, codec dependencies, and display component replacements are familiar territory for time-based media conservators. Here, art conservation methods intersect with IT disciplines: inventory devices, clone storage, write deployment instructions, and maintain relationships with vendors. For emerging materials, humility is healthy: ask, read, and test before making commitments about permanence or behavior.
Cleaning decisions: dry and wet approaches, testing, and documentation
Surface cleaning is tempting because it delivers visible results, yet it is also where caution pays off the most. Start dry: soft brushes, vulcanized rubber sponges, and gentle rolling motions can lift loose dust without dragging particles across delicate surfaces. Keep brush ferrules away from the object, and use a HEPA vacuum with a mesh screen for controlled suction when appropriate. Observe how the surface behaves: does a matte acrylic lift? does graphite smear? does charcoal shed?
If dry methods do not achieve goals, small wet tests come next. Use deionized water or a mild solution applied with swabs in tiny circles, testing in the least conspicuous area first. Watch closely for color lift, sheen change, swelling, or tide lines. Log recipes, dwell times, and observations. Where surfactants or chelating agents are considered, consult references and colleagues, and think carefully about residues and long-term interactions. Facings (temporary tissue layers) can hold loose media during cleaning, but practice their application and release on mockups to avoid surprises.
Documentation is part of cleaning. Photograph test patches with scale and reference notes; draw a map of where each recipe was used; and write what you rejected and why. Future caretakers may need to understand not only what you did, but what you chose not to do. This discipline supports the ethos of minimal intervention and makes it easier to explain your reasoning to curators and owners.
Stabilization, consolidation, and mounting options
Stabilization measures focus on keeping the whole system coherent. For paintings with minor lifting, gentle humidification in a controlled chamber, followed by weighted drying between release papers, can relax distortions. For flaking paint, a well-chosen consolidant introduced locally under magnification may secure fragile flakes. Always test on margins or mock samples, and be mindful of gloss, color shift, and stiffness after consolidation; a good choice secures without locking the object into a brittle state.
Mounting and supports are often the silent heroes. A drawing stored in a poor-quality mat can suffer more than one mounted in a well-cut, buffered board with hinged corners. Consider sink mats for thick or deckled papers. For canvases, a well-made stretcher or strainer with appropriate tensioning hardware reduces stress. Avoid trapped fasteners that rust or off-gas; favor stainless or brass, and isolate dissimilar metals when possible. If an artwork is unusual in shape or weight, custom cradles or armatures can carry loads so the object does not have to.
Reinforcement should never bully the object. The goal is support that follows the object’s natural behavior. For example, a thin panel painting that cups may need a flexible frame system rather than a rigid backing that forces it flat, which can cause new cracks. When options are ambiguous, invite peer review, create prototypes, and record decisions. In all cases, ensure that the path back remains open should a future team choose a different strategy.
Environmental control: humidity, temperature, pollution, and pests
Environment is a quiet collaborator in conservation. Relative humidity (RH) and temperature swings drive warping, cracking, and dimensional change. A steady RH around a chosen set point (many institutions select a narrow band like 45–55% RH for mixed collections) helps materials equilibrate gently. More important than any single number is stability: avoid rapid changes caused by HVAC cycles, open windows, or poorly sealed cases. Data loggers are affordable and reveal patterns you might miss by feel alone; place them at art height, away from vents and sun patches.
Temperature interacts with RH. Warm air holds more moisture, and the same absolute water content can translate to different RH at different temperatures. Coordinate with facilities teams to tune schedules that protect collections while respecting energy constraints. Where central systems cannot achieve uniformity, microclimates—sealed frames with buffered mats, silica gel inserts, or display cases with passive controls—offer local solutions. Track these with small sensors so you know when to refresh buffers.
Air quality matters, too. Dust acts like sandpaper; pollutants like ozone and sulfur compounds accelerate oxidation or discoloration; and pests exploit organic materials. Simple habits reduce risk: regular housekeeping, walk-off mats at doors, covered trash, avoiding cardboard and raw wood in storage, quarantining incoming shipments, and using integrated pest management (IPM) traps. When signs of infestation appear, isolate objects, assess, and consult qualified specialists for safe, targeted responses. Record every observation in a log so trends become visible.
Lighting and display: lux levels, UV filtering, and visitor experience
Light is both friend and foe. It reveals, but it also fades and embrittles. For light-sensitive media (watercolors, dyes, newsprint), many institutions cap illumination at 50 lux; for less sensitive works (oils, metals, stone), 150–200 lux is common. These are guidelines, not commandments; the right level depends on object history, exhibition goals, and visitor sightlines. Use calibrated meters and document settings. Where possible, dim dynamically when visitors are absent, and avoid spotlight hot spots that create uneven aging and visual discomfort.
UV radiation is particularly aggressive. Apply UV-filtering films to windows and case glazing, choose LEDs with low UV output, and use filters on fixtures when needed. Balance fidelity and protection: extremely warm light may misrepresent colors, while very cool light can flatten texture. Test scenes with curators and educators to ensure legibility for different audiences. Labels and graphics should be legible under the same constraints; consider large print options and braille where appropriate.
Display hardware deserves attention. Secure mounts that do not stress objects, barriers that prevent touching without feeling hostile, and pathways that avoid bottlenecks all contribute to a safe, welcoming experience. For interactive or time-based works, plan daily startup and shutdown routines that are easy to execute consistently. Document these with clear, concise instructions posted discreetly near the equipment and in your digital systems.
Storage and transport: housings, packing, and handling checklists
Storage is where most objects spend most of their lives, so housing quality multiplies across time. For works on paper, buffered folders and boxes, interleaving sheets, and properly supported stacks maintain order and reduce abrasion. For paintings, padded shelving or carts with separators keep frames from knocking together. Shelving should be anchored, load-rated, and spaced for staff to maneuver without bumping edges. Avoid storing on the floor; even a few inches of elevation protects from minor leaks.
Packing for transport is an art of anticipation. The questions to ask: what forces will this object experience? who will carry and set it down? what weather will it cross? Build layers that answer those questions: a primary wrap that controls dust and moisture exchange; a protective shell that guards against impact; and a labeled exterior that tells handlers what is inside and which side is up. Choose foams that do not crumble or off-gas, and cut recesses to prevent pressure points. For short trips, a well-designed travel frame can stay with the object from studio to gallery and back.
Handling is culture. Train everyone—from interns to executives—in how to lift, carry, set down, and signal. Use two-person carries for large works, and rehearse turns and doorways before moving. Write handling checklists, post them near storage, and run drills. Keep gloves handy but choose types appropriate to surface (sometimes clean bare hands offer better grip and feedback). Encourage a no-blame attitude: if a slip occurs, stop, assess, and learn together rather than hiding mistakes. Culture beats rules when seconds count.
Digital conservation: metadata, files, and reproducibility
Digital records are another layer of care. A strong naming convention prevents confusion: include accession or job numbers, short titles, view indicators (verso, recto, detail), and dates in a predictable order. Store files in a managed repository with redundant backups and access controls. Write brief but clear metadata: who created the file, what it depicts, when, and why. Avoid orphaned folders on personal desktops; centralize so colleagues can find what they need without guesswork.
Photographs and scanned documents should be archived in non-proprietary formats when practical (e.g., TIFF for images, PDF/A for documents). Maintain at least two geographically separate copies. Test restores periodically; a backup you cannot restore is no backup at all. For time-based media and software-based works, capture not only the media files but also the environment: operating system, runtime libraries, playback devices, display settings. When possible, document procedures for recreating the environment on future hardware. That reproducibility is often more important than the file itself.
Sharing responsibly matters. If you publish a selection of reports or images, anonymize sensitive fields and adhere to rights agreements. Internal portals—wikis, intranets, shared drives—are practical venues for quick access. External sharing can point readers to broader resources; for example, explore articles and references on Albertini Arts to connect your team with essays, glossaries, and case notes that complement your in-house policies.
Collaboration and communication: artists, lenders, and insurers
Effective conservation is collaborative. With living artists, open-ended questions invite insight: what surface qualities mattered at creation? what kinds of aging feel acceptable? what replacements align with intent if components fail? Document these conversations, and store them with the object’s record so future colleagues can draw on them. With lenders, clear timelines and packing expectations prevent friction; share your checklists, agree on courier roles, and rehearse installation plans in advance.
Insurers look for risk management evidence: policies, training records, environmental logs, and maintenance schedules. Provide concise documentation and be honest about gaps. If you are piloting a new approach—say, a dynamic lighting schedule—explain why, outline safeguards, and offer test results. Transparency builds trust and makes approvals smoother. Internally, cultivate relationships across departments: facilities, security, education, visitor services. Walk through galleries together and invite feedback. Often, the best insight comes from a colleague who notices how visitors lean, how a cart routes through a tight turn, or how sunlight sneaks in at 4 pm in winter.
Communication under pressure is different from communication at rest. Develop incident protocols with templates for notes, photos, and escalation. Train for calm: assign roles (observer, recorder, communicator) so emergencies feel choreographed rather than chaotic. After action, hold a brief review meeting while details are fresh; note what worked and what should change. A good culture treats incidents as learning opportunities rather than blame hunts.
Case studies and decision matrices
Real-world scenarios ground theory. Consider a twentieth-century acrylic painting with heavy impasto and dust-laden valleys. A dry brush lifts most dust, but deeper deposits resist. Tests show that a light swab with deionized water shifts sheen and lifts pigment. The decision matrix weighs audience benefit, artist intent, and risk. The team selects a confined dry cleaning regime, accepts minimal residual dust, and documents test outcomes with macro photos. In the report, they explain that further intervention would introduce visible change without proportionate benefit.
Another case: a collage on acidic board with tape carrier remnants and brittle edges. Options include removing the board, adding a lining, or building a supportive sink mat with edge protection. Tests reveal that adhesive residues are soluble only in aggressive solvents unsuitable for the paper media. The team opts for a custom sink mat, edge guards, and a microclimate frame. They add a note recommending future review if a safer, more selective method becomes available. Here, the decision matrix values reversibility and support over aggressive residue removal.
Decision matrices do not replace judgment; they make it visible. List options, benefits, risks, resources, and reversibility. Score them without pretending to eliminate subjectivity. Invite a colleague to score independently, then compare. When you explain choices to stakeholders, this transparency turns debates from personal preferences into shared reasoning.
Checklists you can copy and adapt
Checklists reduce cognitive load and democratize expertise. Here are modular lists you can adapt to your context.
Intake/Triage
- Verify identification against paperwork; assign an internal ID.
- Photograph in current housing before unframing; note inscriptions.
- Screen for hazards: loose media, active pests, moisture, odors.
- Stabilize if needed before moving to detailed inspection.
- Log chain of custody: who handled, when, where.
Condition reporting
- Neutral description of support, media, and surface features.
- Diagrams (recto/verso) with consistent symbols and legend.
- Photo set: overall, details, color chart, scale, consistent lighting.
- Note prior repairs and materials if known.
- File naming and metadata in your repository.
Cleaning tests
- Start dry; escalate only after observing behavior.
- Record recipes, dwell times, swab counts, and outcomes.
- Photograph test patches with annotated cards.
- Note any sheen change, color shift, or residue concerns.
- Map where each test was applied; justify rejects.
Environment
- Place loggers; baseline RH/temperature profiles for each zone.
- Seal cases and frames; add buffers where beneficial.
- Housekeeping: dust schedules, filter replacements, entry mats.
- IPM traps labeled and checked on routine; maintain a log.
- Review data monthly; adjust setpoints or microclimates as needed.
Lighting
- Measure lux; document target bands per object category.
- Fit UV filters on glazing; select LED spectra that suit the object.
- Eliminate hot spots; balance visitor readability and object safety.
- Set dimming schedules; verify after-hours reductions.
- Calibrate meters annually; keep certificates on file.
Storage and transport
- Use buffered boxes and folders; support stacks and edges.
- Label shelves and boxes clearly; standardize orientations.
- Plan packing layers; select foams and wraps that do not off-gas.
- Write route plans; rehearse tricky moves; assign roles.
- Debrief after moves; update packing notes with lessons learned.
Training, practice, and building a culture of care
People make conservation work possible. Build training paths that move novices from observation to supervised practice to independent work. Pair each hands-on station with laminated quick guides. Encourage reflective practice: brief logs of what each person did, what went well, and what felt uncertain. Invite cross-department shadowing so educators, registrars, and facilities staff understand one another’s constraints and find shared solutions. Host short, focused drills—a mock intake, a packaging rehearsal, a lighting survey—so habits form before an exhibition rush.
Culture shows up in how you talk about “small things”. A smudge on a mat, a label creeping loose, a cable draped across a walkway—each is a chance to practice care. Leaders can model this by praising quiet fixes, asking for input, and scheduling time for maintenance. Recognize that not all institutions have the same resources; if you are in a small organization, choose a few high-leverage improvements (better housings, a data logger, a simple wiki) and build from there. The most durable art conservation methods are the ones your team can repeat calmly under normal pressure.
Putting it together: a one-page plan for your next project
Before your next intake, draft a single page that you can print and reuse. Title, object ID, owner contact, intake date; a checkbox list for photos and diagrams; space for initial observations; a box for test plans with areas and recipes; a decision table with options, pros, risks, and reversibility; and a summary field for the selected path. Add lines for responsible people and review dates. Post a copy on the project board and save a PDF with the object’s digital record. That one page will become your meeting anchor and your memory.
Finally, revisit decisions when conditions shift. If a display unexpectedly draws heavy crowds and heat rises, adjust lighting and schedules. If a test fails, pause and rethink. If a new resource appears—an artist interview, a technical paper, a colleague’s insight—integrate it. Conservation is a commitment to sustained attention, not a single event. By centering ethics, structure, and observation, you give every object a thoughtful future.
