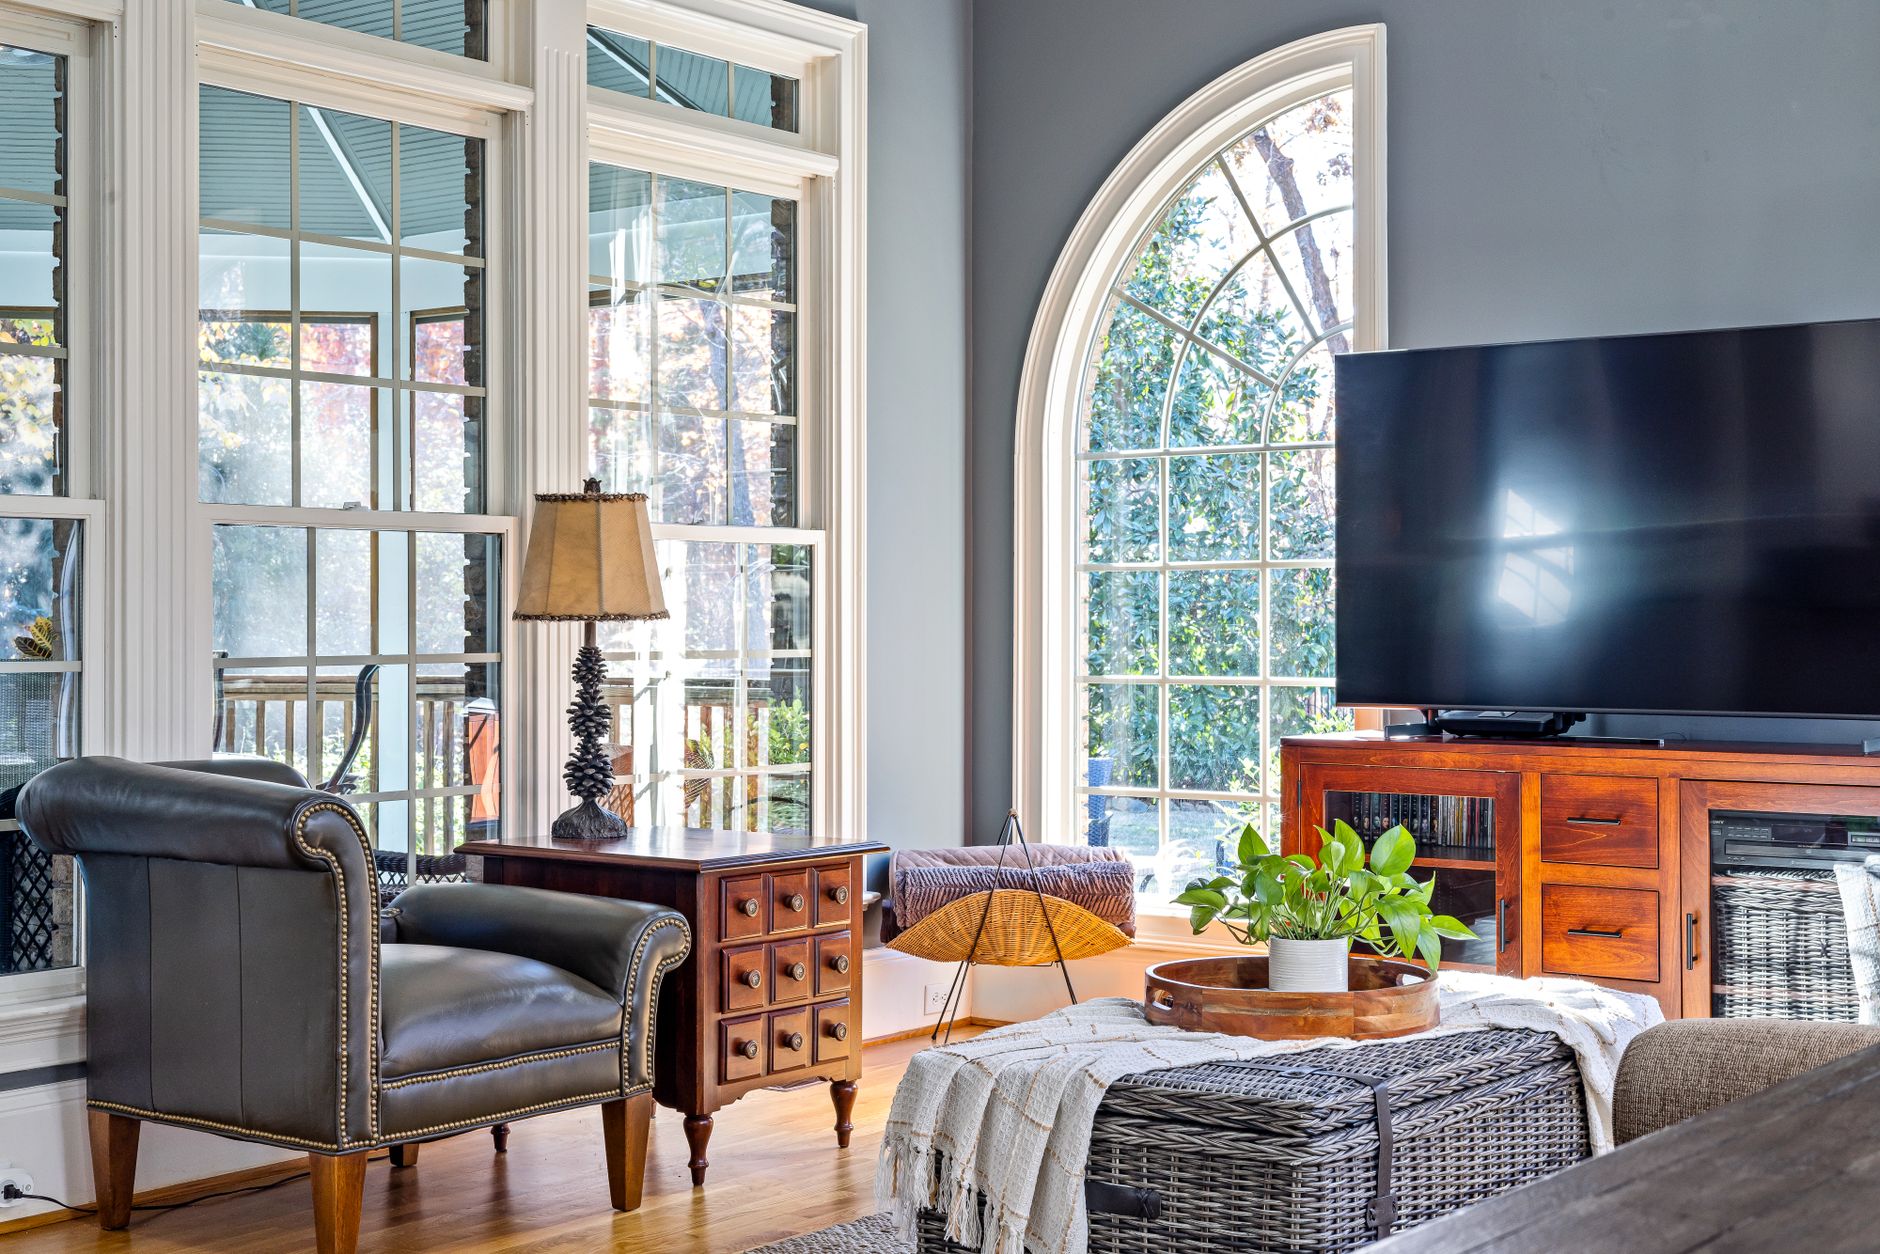
If you’ve ever wanted to bring the big-screen experience into your home, this step-by-step guide to home theater setup for movie lovers keeps the process clear, practical, and budget-aware. You’ll learn how to choose the right room, arrange seating for every guest, pick a display and speakers that fit your space, configure streaming devices for the best picture and sound, and dial in calibration without expensive tools. Along the way, you’ll find checklists, placement tips, and upgrade paths so you can start small and still end up with a space that feels genuinely cinematic.
home theater setup for movie lovers: planning checklist
Before buying any gear, write down your goals, constraints, and timeline. Clarity at the start keeps you from chasing the wrong spec sheet or overspending on features that won’t matter in your room.
- Purpose: Is the space primarily for movies, or also for TV, gaming, and sports? Each adds demands—movies value contrast and quiet, sports value brightness and motion, and gaming values low input lag.
- Room: Measure length, width, and height. Note doors, windows, and reflective surfaces. Identify sources of light and noise.
- Audience: Typical group size and seating. Decide if you’re optimizing for one “sweet spot” or for multiple rows.
- Content and sources: Streaming only, or also discs and local files? Your answer guides device and cabling choices.
- Budget: Set a ceiling and allocate it—roughly 40% picture, 40% sound, 10% room/lighting, 10% control and cabling. Adjust for your priorities.
- Timeline: Build in stages. Start with a capable display and front speakers. Add surrounds, subwoofers, and acoustic tweaks later.
Sketch the room to scale. Mark the screen wall, your primary seat (often called the main listening position), pathways, and likely speaker spots. A simple drawing exposes conflicts—like a door that swings into a speaker, a window that splashes light across the screen, or a pathway that crosses the projector beam. Treat the sketch as a living plan you’ll refine in later steps.
Designing the room: dimensions, light control, and noise
A controllable room beats a bigger but bright and reflective one. A rectangular space with a closable door and limited windows simplifies both picture and sound. That said, many great theaters live in shared living rooms; you’ll just plan differently and lean more on lighting and decor to manage the environment.
Dimensions and proportions: Rooms with length-to-width ratios around 1.3–1.6 reduce extreme standing waves, but you can still get excellent results in squares and L-shapes with smart subwoofer placement and basic acoustic treatment. Leave a little space behind the couch if possible; seating tight against the rear wall often exaggerates bass peaks and reduces surround envelopment.
Light control: For contrast, the front wall and ceiling area near the screen should be darker neutral tones (grays work well) to reduce reflections. Install blackout curtains or cellular shades for windows. Plan lighting circuits that dim smoothly and avoid shining directly on the screen. If the room shares daytime duties, budget for an ambient light rejecting (ALR) screen or a higher-brightness TV.
Noise and HVAC: Quiet sells immersion. Move noisy gear—like network drives and game consoles—into a ventilated cabinet or a nearby closet. If you hear HVAC vents or rattling doors during quiet scenes, add simple fixes like felt pads, weatherstripping, or decoupled vent covers. Equipment needs airflow; leave a few inches behind AVRs and do not fully enclose a projector without an exhaust path.
Safety and comfort: Plan cable routes that won’t create trip hazards, and keep pathways clear. Provide small side tables and throw blankets; comfort keeps people engaged. If the room gets warm, quiet fans or a small airflow path behind equipment racks can help keep temperatures reasonable while avoiding fan noise in the listening area.
Seating geometry and sightlines
Great seating means the screen is centered and at a comfortable height, and ears are roughly symmetric within the speaker layout. Geometry drives comfort and immersion more than most gadgets do.
- Viewing distance: For TVs, 1.2–1.6x the screen diagonal is a common starting point; for projectors, slightly closer delivers more “cinema” scale. If you sit too far, 4K detail is wasted; too close magnifies noise and compression artifacts.
- Screen height: Aim to keep the screen center near eye level of the front row. If a center channel or cabinet forces the TV up, tilt it slightly downward to reduce neck strain and reflections.
- Angles: Keep primary seats within ±20–25 degrees of the centerline. LCDs tend to lose color and brightness off-axis, while OLEDs hold quality better but still feel less immersive at wide angles.
- Multiple rows: If you add a second row, make sure the back row sees over the front. A simple platform riser of 6–8 inches paired with bar stools is an affordable solution without framing a permanent stage.
In shared living rooms, consider a “movie mode” layout that nudges a sectional a foot closer and centers an ottoman on movie nights. Small adjustments like moving a coffee table or adding a removable center-seat stand can align sightlines and acoustics without remodeling.
Choosing a display: projector or TV
Projectors and TVs can both produce cinema-worthy pictures, but they thrive in different conditions. Decide based on room light, desired size, maintenance tolerance, and budget.
Projector strengths
- Size per dollar: Screens in the 100–120-inch range are attainable at prices far below similarly sized TVs.
- Ambience: With lights dimmed, a projected image blends with the room, producing a classic “theater” feel.
- Screen flexibility: Fixed frames, motorized pull-downs, or ALR screens let you adapt to your room and viewing habits.
Projector trade-offs
- Light control required: Even ALR screens can’t fully overcome bright daytime rooms; expect best results in dim environments.
- Maintenance: Bulb or laser lifespan, dust filters, focus alignment, and lens shifts are part of the experience.
- Latency and motion: Some projectors are responsive, others less so; gaming responsiveness varies widely.
TV strengths
- Brightness and HDR: OLED and mini-LED sets provide high contrast and highlight pop without room blackouts.
- Simplicity: No alignment or focus drift. Setup is faster and easier for households that share a single room for many uses.
- Motion handling: Many TVs handle motion cleanly. Film content often looks best with motion smoothing off, while sports can benefit from low or medium settings if you prefer.
TV trade-offs
- Cost per inch: Above 83 inches, prices rise quickly.
- Reflections: Glossy screens reflect lamps and windows. Manage room lighting and consider screens with anti-reflective coatings if the budget allows.
Rule of thumb: If you can darken the room and want 100 inches or more, projection feels magical. If you need a bright picture anytime and value simplicity, a large OLED or mini-LED TV will be the stress-free choice. A pragmatic compromise is a 77–85-inch TV paired with bias lighting for everyday viewing and a pull-down projector for special movie nights in a darker room.
Building your sound system: from stereo to Atmos
Sound carries story and emotion. Dialogue clarity, solid imaging, and convincing bass matter as much as screen size. You don’t need a huge system to start; even a good stereo pair flanking the TV will outperform any built-in speakers. Then scale up as budget and space allow.
Good-better-best ladder
- Good: 2.0 or 3.1 (left-right plus optional center and sub). The center channel anchors voices to the screen; a subwoofer supplies weight without overwhelming the room.
- Better: 5.1 (front trio plus two surrounds). Mount surrounds slightly above ear height, 90–110 degrees relative to the main seat.
- Best: 5.1.2, 7.1, or 7.1.4 with height channels. Dolby Atmos height speakers add vertical cues when room geometry and ceiling materials cooperate.
Placement basics
- Front stage: Form an equilateral triangle with the main seat; toe-in slightly for a focused center image. Keep the left and right out of corners to avoid boomy midbass.
- Center channel: Aim the tweeter near ear height, not buried low on a shelf. If the TV sits on a cabinet, angle the center upward toward listeners.
- Subwoofers: Start with placement near the front wall. If bass is uneven across seats, try moving the sub a foot or two at a time. A second sub on the opposite wall or diagonally across the room often smooths bass distribution.
- Height speakers: For Atmos, mount flush to the ceiling above the listening area, or use upfiring modules only if you have flat, non-absorptive ceilings between 8 and 14 feet high.
Receivers and amplification: Choose an AV receiver (AVR) with the channels you plan to grow into, not just today’s needs. Look for enough HDMI 2.1 inputs if you game or run multiple 4K/120 sources. If you use efficient bookshelf or tower speakers, most modern AVRs supply adequate power for normal rooms. External amps add headroom later if you pursue larger, less efficient speakers.
Small room options: Soundbars have improved dramatically. A well-reviewed soundbar with a wireless sub and optional rear modules can deliver credible immersion in apartments or multipurpose spaces. Look for models with true rear channels rather than virtualized effects if surround envelopment matters to you.
Sources, streaming, and formats
Streaming devices and disc players can deliver superb picture and sound when configured to match your display and audio gear. Defaults often favor compatibility over quality, so a few minutes in settings pays off.
- Video output: Set the streaming box to the highest resolution and HDR format your display supports (4K, HDR10, Dolby Vision). Enable “match frame rate” and “match dynamic range” to reduce judder and odd brightness changes.
- Audio output: Use bitstream or passthrough modes so the receiver decodes Dolby and DTS formats. If using a TV as the hub, confirm eARC is enabled for full-bandwidth audio back to the receiver or soundbar.
- App quality: Some apps default to stereo audio or reduced bitrates. Check settings for “Best Quality” options and confirm your subscription tier includes 4K and premium audio.
- Discs and local files: Ultra HD Blu-ray remains a reference for picture and lossless audio. If you keep favorite films, a dedicated player and a small disc library pay off on movie nights.
Networking: Wired Ethernet is still the most reliable for high-bitrate 4K streams. If Wi‑Fi is your path, use 5 GHz or 6 GHz bands, keep the router central, and reduce walls between it and the streaming device. Mesh systems help in larger homes but place nodes thoughtfully to avoid congestion in the theater room.
Wiring, power, and control habits
Good cables and tidy power management cut headaches. This isn’t about boutique wires; it’s about certified cables, clean runs, and simple control that anyone in the household can use.
- HDMI: For 4K HDR at 60–120 Hz, use Ultra High Speed HDMI-certified cables. Over long distances (25 feet and up), consider active HDMI or fiber. Label each end to match the device and input.
- eARC: If your TV is the switcher, eARC sends full-quality audio back to the receiver or soundbar over HDMI. Check settings on both the TV and AVR or soundbar and use a certified cable.
- Power: A quality surge protector protects gear and provides neat plug-in points. Separate high-power devices (amplifiers) from low-power sources to reduce noise risk. Leave ventilation space; heat is a common cause of performance drops.
- Control: A universal remote or a simple app-based control panel reduces friction. Create activity macros like “Watch Movie” that switch inputs, set AVR sound modes, dim lights, and lower shades if you have smart accessories. Label inputs on-screen and on the equipment so guests can navigate with confidence.
Plan cable management early. In-wall conduit, baseboard raceways, or under-rug flat cables hide visual clutter and reduce snag risks. A clean install also helps airflow around electronics and makes future upgrades less daunting.
Calibration you can do at home
Picture and sound move from “good enough” to “engaging” with a few careful adjustments. You don’t need expensive tools—just a sensible approach and a bit of patience.
Video quick wins
- Picture mode: Start with “Cinema,” “Movie,” or “Filmmaker” mode. These generally aim for accurate color and gamma. If calibration looks too warm initially, give it a few minutes; your eyes adapt.
- Black and white levels: Use test patterns from a trusted YouTube channel or a calibration disc. Adjust brightness until shadow detail is visible without turning blacks gray. Adjust contrast until highlights are bright without clipping detail.
- Motion and sharpness: Reduce or disable motion smoothing for films if you dislike the “soap opera” look. Keep sharpness low; artificial edge enhancement adds halos and noise.
- HDR tone mapping: If your TV offers options like “dynamic tone mapping,” test with a familiar scene. Choose the setting you prefer, then leave it consistent to build muscle memory for how HDR looks in your room.
Audio quick wins
- Speaker levels: Use your AVR’s test tones to balance channels. Set the subwoofer so bass feels present but controlled—never masking dialogue.
- Delays and distances: Input actual seating distances for each channel. Correct timing locks dialogue to the screen and stabilizes the soundstage.
- Room correction: If your receiver includes software like Audyssey, YPAO, or Dirac, run it carefully. Save a couple of profiles—for solo listening in the sweet spot and for movie-night seating.
- Dialogue clarity: If voices still feel muffled, gently raise the center channel level 1–2 dB and confirm the speaker isn’t obstructed by furniture.
Subwoofer sanity check: A simple “sub crawl” still helps—place the sub at your main seat, play a bass sweep or bass-heavy clip, then walk the room’s edges to find spots with smoother, more even bass. Place the sub there and re-run levels. If you later add a second sub, retest; dual subs can transform bass consistency across seats.
Lighting, decor, and acoustics on a budget
Atmosphere matters. Controlled lighting, subtle décor, and a few soft materials create immersion even before the first line of dialogue.
- Dimmers and scenes: Install dimmers and create “pre-show,” “intermission,” and “credits” scenes. Warm bulbs (2700–3000K) feel cozy; neutral bias lighting behind a TV (around 6500K) reduces perceived glare and eye strain.
- Bias lighting: A soft LED strip behind the TV or around the screen helps the image pop at moderate brightness while making dark rooms more comfortable.
- Wall color: Paint the front wall darker gray or another neutral; side and back walls can stay warmer for a welcoming look that still controls reflections near the screen.
- Soft materials: Rugs, curtains, plush chairs, and fabric wall art reduce slap echo. You don’t need to turn the room into a studio—just add a few soft surfaces to balance hard floors and walls.
- Acoustic panels: If you go further, place modest panels at the first reflection points along side walls (use a mirror to find them) and consider a few on the rear wall. Start basic; listen; then decide if you need more.
- Storage and concealment: A low media console with cable pass-through keeps gear tidy. Ventilated doors and open backs protect airflow.
Stylish touches reinforce the theme without shouting: a framed poster of a favorite film, a letter board with quotes for guests to change, or a small display of classic discs. Keep décor below the screen minimal to avoid visual distractions competing with the image.
Budgets, upgrade paths, and sample builds
Transforming movie night doesn’t demand a blank check. Plan in layers, address the weakest link first, and enjoy each step forward. Here are three sample build paths to calibrate expectations and guide shopping. Prices vary by region and sales; think in ranges.
Starter (aim: a big upgrade over TV speakers with minimal rewiring)
- 65–75-inch TV or a short-throw projector with a pull-down screen
- Quality soundbar with wireless sub and optional rear modules
- Streaming box configured for frame-rate and dynamic-range matching
- Blackout curtains for windows and a dimmer for the main light
- Modest total cost, focused on simplicity and immediate impact
Intermediate (aim: real surround with flexibility)
- 77–85-inch TV or 100–120-inch projector with an ALR screen
- AVR with 5.1.2 or 7.1 capability and at least a couple of HDMI 2.1 inputs
- Bookshelf or compact tower LCR speakers, two surrounds, one subwoofer
- Universal remote or app-based control with simple activity macros
- Basic acoustic treatment: rug, curtains, and a few reflection-point panels
- Mid-range budget with clear upgrade paths for more bass or height channels
Enthusiast (aim: long-term platform and consistent immersion)
- Flagship OLED or mini-LED TV, or a high-contrast projector on a 120–140-inch screen
- 7.1.4 Atmos with two subwoofers for smoother bass across seats
- Dedicated media cabinet with ventilation, wired Ethernet, and clean power
- Professional-level calibration when the system is stable and you’ve learned its quirks
- Higher budget and deliberate pace—upgrade one piece at a time to hear and see what matters
Upgrade logic: Fix the most obvious limitation first. If dialogue lacks clarity, improve the center speaker. If the picture looks flat, manage light and adjust settings before assuming you need a new display. If bass feels uneven, experiment with placement and levels; adding a second subwoofer later can make a larger difference than swapping to a more expensive single sub. Keep a simple log of changes so you can undo what didn’t help and keep what did.
Maintenance, troubleshooting, and future-proofing
Routine care preserves performance and reduces surprises. None of this is glamorous, but a little consistency extends the life and enjoyment of your system.
- Firmware: Check TV, projector, AVR, and streaming devices quarterly. Updates often improve HDMI handshake reliability, eARC behavior, and app stability.
- Dust and airflow: Wipe vents and grills gently with a microfiber cloth. Clean projector filters per the manufacturer’s schedule. Avoid stacking gear tightly; heat build-up can cause intermittent issues.
- Recheck calibration: Displays drift. Revisit brightness, contrast, and white balance a couple of times a year. For audio, re-run level matching after moving furniture or adding seats.
- Cable sanity: Label cables at both ends and keep a simple diagram in your media cabinet. It pays off when you rearrange or add sources.
- Content habits: Test new movies with familiar clips you know well, then adjust minor settings if needed. Consistency builds your ear and eye for how the system “should” look and sound.
When new standards arrive—new HDR formats, faster HDMI versions, or fresh streaming boxes—evaluate the upside in your room before upgrading. Often, better placement and calibration yield more visible improvement than new gear. When you do upgrade, change one variable at a time and live with it for a week so you can tell what changed and whether it was worth it.
A great home theater isn’t a museum of equipment. It’s a room where people relax, watch stories, and share time. Start with the room you have, choose a display that suits your light and seating, build a clear and balanced front stage for dialogue, and give yourself time to learn how your system behaves. If you’d like more movie-night inspiration and related articles, visit Albertini Arts for ideas inside our Movie Entertainment focus. Keep notes, upgrade in layers, and enjoy the process. The best compliment you’ll hear is still the simplest: “Can we do this again next week?”