If you want movie night to feel like the movies, start with a clear plan for your home theater setup. This guide walks you through the entire process, from choosing the room to dialing in sound and picture, with real‑world numbers, simple formulas, and checklists you can actually follow. No brand hype, no magic boxes—just practical decisions that add up to a room that disappears and a story that takes over.
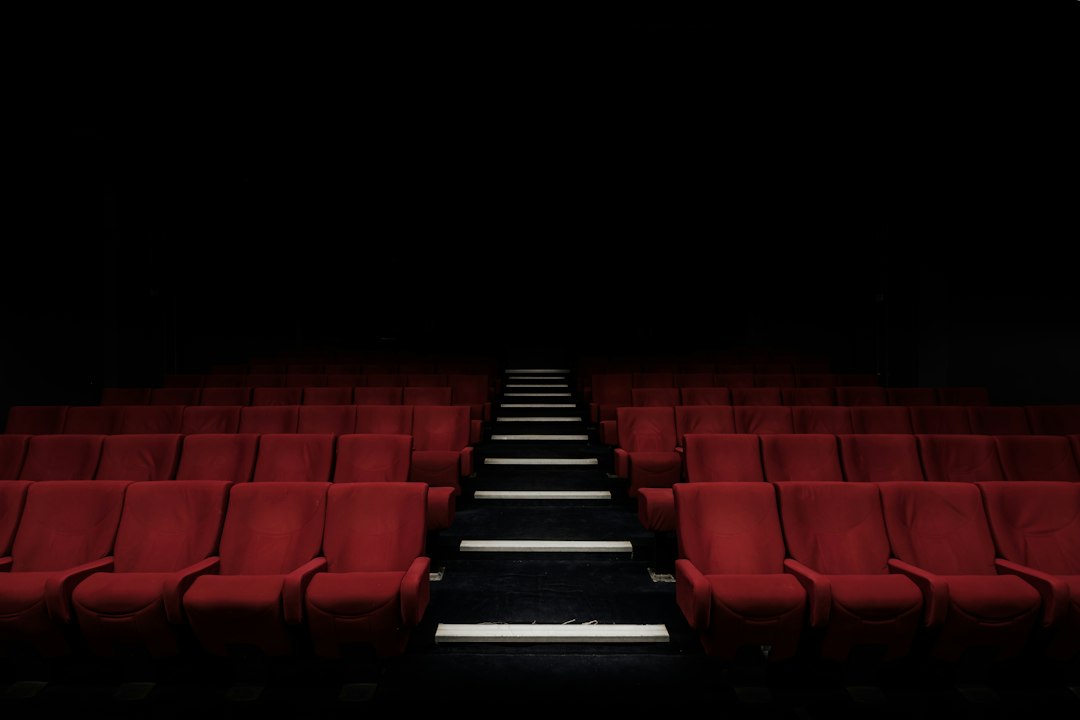
Whether you’re renovating a basement, converting a spare bedroom, or simply optimizing a living room, the core ideas are the same: put the screen at the right size and height, seat people where their eyes and ears belong, guide light and sound instead of fighting them, and connect everything with reliable power and cables. Along the way, you’ll find rules of thumb, comparison points, and bite‑size checklists. For more ideas and film features, explore Albertini Arts, where the Movie Entertainment spirit runs through every story.
home theater setup roadmap
Great results come from a simple sequence done in order. Use this roadmap as your north star before you buy a single box.
- Define the room: length, width, height, doors, windows, and noise sources. Sketch it to scale.
- Pick a seating count and layout: one row, two rows with a riser, or a couch with lounge chairs.
- Choose screen type and size: TV for bright multipurpose rooms, projector for big cinematic images in controlled light.
- Plan audio layout: start with a 5.1 or 7.1 bed layer; add height speakers for Atmos where possible.
- Decide light control strategy: dimmers, blackout shades, wall color, and light baffles.
- Map power and cabling: dedicated circuit if possible, surge protection, and cable paths that can be serviced later.
- Pick sources and control: streaming boxes, disc player, game console, and a single remote/app to rule them all.
- Allocate budget in phases: sight and sound first; cosmetics and automation can wait.
When you get stuck on a choice, ask which option best serves immersion, reliability, and future flexibility. The rest is preference.
Picking the right room and layout
Your room choice decides 70% of the experience. A rectangular room with solid walls is easier to tame than an open plan living area. If you can, aim for a room length at least 1.4–1.6× the width. Avoid perfectly square rooms; they exaggerate bass peaks and nulls. If the room is shared space, plan for compromises: a slightly smaller screen, darker paint on the front wall only, and furniture that doubles as storage for discs, remotes, and blankets.
Start with a scale drawing. Mark doors, windows, vents, and obstacles. Note the primary viewing position, often the middle of the main seating row. In multipurpose spaces, consider a “media wall” with a TV and low‑profile left/center/right speakers hidden behind acoustically transparent fabric. In dedicated rooms, leave space up front for either an acoustically transparent screen with speakers behind it or a TV with speakers flanking it at ear height.
Think in zones:
- Front stage: screen, left/center/right speakers, subwoofer location options, cable access.
- Listening area: primary row centered on the screen; secondary row on a riser if needed.
- Service lane: a walkway behind the last row to reach gear, shades, and storage without blocking the picture.
Keep noisy gear (like a projector or NAS) outside the room when possible, or in a ventilated closet with a hush box. Quiet is golden—noise floors below 30 dBA let detail shine.
Screen choice: OLED, QD‑OLED, Mini‑LED, or projector?
There is no universal best screen—only the best for your room and viewing habits. Use these anchors:
- TV (OLED/QD‑OLED): Exceptional black levels and contrast, perfect for dark rooms and HDR movies. Bright enough for mixed‑use spaces, but watch for reflections. Typical sizes: 65–83 inches; 97 inches exists at a premium.
- TV (Mini‑LED/LED‑LCD): Higher brightness for daytime sports, usually lower cost per inch, but blacks and off‑axis viewing trail OLED. Sizes from 55 to 98 inches are common.
- Projector: The king of size (100–150 inches easily, 120 inches is a sweet spot). Needs light control and a proper screen. Black levels depend on room treatment and projector class. UST (ultra short throw) works against an ALR (ambient light rejecting) screen in living rooms; long‑throw wins in dedicated rooms.
Size by distance: for 4K content, a comfortable formula is viewing distance ≈ 1.2× the screen diagonal (inches). For example, at 10 feet (120 inches) a 100‑inch screen feels cinematic without being overwhelming; at 8 feet (96 inches) an 83‑inch TV is a strong match.
Height matters: the center of the image should sit at or slightly below seated eye level (typically 40–48 inches from the floor). If you wall‑mount a TV over a cabinet, keep the bottom edge about 24–30 inches from the floor to avoid neck strain.
Projector specifics:
- Gain: In dark rooms, screens with 1.0–1.3 gain balance brightness and uniformity. ALR screens help in ambient light but reduce vertical viewing tolerance.
- Lumens: Target 50–70 nits at the screen for SDR movies (calculate lumens / screen area / screen gain). HDR projectors simulate highlights through tone‑mapping; room darkness still rules.
- Throw and lens shift: Ensure your projector’s throw ratio matches the room depth and that lens shift covers desired placement without keystone corrections.
Audio architecture: 5.1 to 7.1.4 and beyond
Sound is half the movie. A well‑placed 5.1 can beat a poorly placed 11‑speaker system. Start with a solid bed layer, then add height channels.
- Listening position (LP): Center the main seat on the screen and, if possible, at about 0.6–0.7× room length from the front wall.
- Front LCR: Left/Right speakers form a 45–60° angle from the LP; the center goes at screen mid‑height. Tweeters at ear level. If using an acoustically transparent screen, line all three at the same height behind it.
- Surrounds: For 5.1, place surrounds 90–110° relative to the LP, 1–2 feet above ear height. For 7.1, add rear surrounds at 135–150°.
- Heights (Atmos): Four heights (Top Front + Top Rear) give better envelopment than two. Aim speakers toward the LP, 35–45° elevation. Up‑firing modules work best under flat, reflective ceilings 8–10 feet high.
- Subwoofers: Two subs placed at midpoints of opposite walls (front/back or left/right) smooth bass in most rooms. Crawl method: place the sub at the LP, play bass sweeps, crawl around the room to find smooth spots—put the subs there.
Power the system with an AVR or processor/amps that honestly meet your speaker sensitivity and room size. For most living rooms, an AVR rated around 80–120 W/ch into 8 ohms (two channels driven) is plenty; external amps help with inefficient speakers or large rooms.
Remember: placement > price. Spend an extra hour with a tape measure and protractor app; you’ll hear the return on investment immediately.
Power, cabling, and signal chain hygiene
Reliable power and clean signal paths prevent half the gremlins people blame on gear. If possible, dedicate a 15 or 20 A circuit to the theater. Use quality surge protection or a power conditioner rated for your load. Label every plug and cable at both ends.
HDMI matters: for 4K/120 gaming or 8K passthrough, use certified Ultra High Speed HDMI 2.1 cables. Keep long HDMI runs under 15 feet unless you use active optical (AOC) or hybrid fiber; test long runs before sealing them in walls. For projectors, a conduit with pull strings future‑proofs upgrades.
Network: streamers and smart control appreciate stable Ethernet. If you must use Wi‑Fi, place an access point near the room and avoid 2.4 GHz congestion. A simple unmanaged gigabit switch in the cabinet keeps things tidy.
Signal chain checklist:
- Shortest reasonable cable paths, gentle bend radii, no tight coils.
- Keep power and signal lines separated where possible; cross at 90° if they must meet.
- Use banana plugs/spades for speaker cables to avoid stray wire strands.
- Document the chain: source → AVR/processor → display and amps, with input labels that match on‑screen names.
Seating, risers, and sightline math
Comfort sustains immersion. Start by deciding how many seats you need most nights; don’t design the whole room for the once‑a‑year crowd. For a single row, center the couch on the screen and pull it forward to the ideal viewing distance (≈1.2× diagonal for 4K). If you need two rows, a riser behind the first row preserves sightlines and audio balance.
Sightlines: the rear row’s eye height should see at least the bottom edge of the screen over the heads of the front row. A quick rule: riser height (inches) ≈ (eye height front to rear difference + screen bottom offset + cushion compression) / viewing geometry. Practically, most risers end up 8–12 inches high with a step. Leave 24–30 inches of knee clearance in front of each seat and about 20 inches between armrests.
Seat specs:
- Seated eye height: ~40–42 inches for many adults; measure your family to be sure.
- Recline space: 6–10 inches behind the seat if using powered recliners.
- Aisles: 24 inches minimum; 30 inches is gracious.
Lastly, angle the primary row so ears are equidistant from left and right speakers. An inch‑level tweak fixes center imaging more often than a new center channel.
Light control and cinematic ambiance
Light is either your friend or your enemy. In projector rooms, it’s the enemy—at least during the movie. In TV rooms, it’s the friend—until it reflects in the glass. Control both direct light and reflections.
Paint the front wall and ceiling area around the screen with a dark matte color (deep gray, charcoal, or navy) to reduce reflections and improve perceived black level. In dedicated rooms, go darker on all walls; in shared spaces, treat only the front third of the room and use dark decor (rugs, curtains, velvet frames) to absorb stray light.
Window strategy:
- Blackout shades with side tracks stop light leaks better than drapes alone.
- Layer light control: sheer shades for day, blackout for night; add a curtain for extra seal and style.
- For UST projectors, invest in an ALR screen specifically designed for UST geometry.
Lighting layers for ambiance:
- Task: dimmable sconces or downlights aimed away from the screen.
- Accent: LED coves, step lights, toe‑kicks on risers.
- Guidance: low‑level pathway lighting you can leave on during late arrivals.
All lights should dim smoothly without flicker; pair LEDs with compatible dimmers. Create at least three scenes—Pre‑Show, Intermission, and Credits—so movie night feels intentional from the first glow to the last fade.
Acoustics and room calibration
Even excellent speakers sound mediocre in a lively room. Tame reflections and bass first, then run calibration.
Start with the front wall: absorption behind the left/center/right reduces early reflections and cleans up dialogue. Treat first reflection points on side walls and ceiling (use a mirror and a friend: where you see the speaker from the main seat is a treatment location). For bass, place broadband panels 4 inches thick with an air gap, plus bass traps in front corners. Diffusion on the rear wall preserves energy without flutter echo.
Basic treatment targets:
- 20–30% of wall surface treated with a mix of absorption and diffusion.
- Panels at ear height across the listening area; ceiling cloud above the main row.
- Rugs on hard floors to reduce slap echo between floor and ceiling.
Calibration steps:
- Run your AVR/processor’s auto‑EQ (Audyssey, Dirac, YPAO, ARC Genesis) after placing speakers correctly. Use a tripod for the mic at seated ear height.
- Verify crossovers: common starting point is 80 Hz for all speakers; raise to 90–120 Hz for smaller surrounds.
- Level‑match channels to 75 dB SPL using a test tone and an SPL meter app; trust your ears for small trims after a week.
- For subs, use the built‑in room EQ, then fine‑tune with a test sweep and a phone‑based RTA to minimize peaks.
Calibrate display modes too: select Filmmaker Mode or Cinema mode, set Warm color temp, disable motion smoothing, and adjust brightness/contrast with a basic test pattern. If you love tinkering, hire a pro calibrator later for the last 10%.
Sources, streaming, and discs
Your picture and sound can only be as good as the source. 4K HDR streaming is excellent today, but high‑bit‑rate UHD Blu‑ray often looks and sounds cleaner, especially in complex scenes with fast motion or heavy grain.
Build a balanced stack:
- Streaming box: Keep apps updated, set match dynamic range and frame rate to “On,” and use Ethernet where possible.
- UHD Blu‑ray: For reference nights, discs still deliver robust video bitrates and lossless audio (Dolby TrueHD/DTS‑HD MA), plus Dolby Atmos/DTS:X without streaming quirks.
- Game console: Enable 4K/120 and VRR if your display supports it; use Game mode to cut latency.
- Media server/NAS: If you rip your own discs, store them on a NAS and use a legal playback solution that supports your codecs and metadata.
Audio formats: set bitstream output on players to let the AVR decode Dolby and DTS. For music, try high‑resolution streaming services; many AVRs support them natively.
Keep cables short between sources and AVR, with the longest HDMI run going from AVR to display. If eARC is stable on your devices, it simplifies routing; if not, route everything into the AVR and send one clean HDMI to the display.
Control systems and automation
Nothing kills the vibe like three remotes and a hunt for the right input. Aim for one button to start showtime and one to end it.
Options scale with complexity:
- Unified handset: A quality universal remote or hub‑based solution can power on devices, set inputs, and dim lights with one macro.
- App‑first control: Many modern AVRs and streamers offer solid apps. Use them to group inputs into profiles (Movies, Games, Sports).
- Voice: Handy for lights and volume (“Volume 35,” “Movie scene”). Keep critical functions on physical buttons to avoid shouting during tense scenes.
- Automation: Smart switches or scenes that trigger blackout shades, set the thermostat, and arm a “Do Not Disturb” mode on doorbells put polish on the experience.
Keep the rack cool and quiet. Ventilate cabinets, add a temperature probe, and tie fans to a smart plug you can automate with the same scene that starts the movie.
Budget, phasing, and upgrade paths
Spend where it matters now; leave the rest for later. A realistic first‑phase budget puts the big rocks in place: screen/TV, front LCR speakers and subwoofer(s), an AVR, light control, and the main seating. Cosmetics and extra rows can wait.
Allocation idea for a balanced starter room:
- Speakers and subs: 35–45%
- Display (TV or projector + screen): 30–40%
- Electronics (AVR/processor, streamer, disc player): 10–15%
- Room treatments and lighting: 10–15%
- Cables, power, mounts, small tools: 5–10%
Phase plan:
- Phase 1: Core playback (screen/TV, LCR, sub, AVR), blackout shades, primary row.
- Phase 2: Surrounds and heights, more bass, acoustic panels, riser.
- Phase 3: Automation, fabric walls, star ceiling, pro calibration.
Upgrade logic: fix the bottleneck you notice most. If dialogue clarity lags, upgrade the center speaker or treat the first reflections. If action scenes lack weight, add or reposition subs. If sports look dim, consider a brighter display before chasing cables.
Care, maintenance, and safety checklist
Small routines keep the magic consistent for years. Make maintenance part of the plan.
- Dust monthly: vents, grills, projector filters, and cabinet surfaces. Use a soft brush and low‑suction vacuum.
- Re‑run room calibration every 6–12 months or after moving furniture.
- Check HDMI and speaker connections twice a year; reseat anything loose and tighten binding posts gently.
- Update firmware for displays, AVRs, and streamers after reading release notes.
- Inspect power protection annually; replace surge strips that have absorbed hits.
- Coil and label spare cables; keep a few tested HDMI and speaker cables on hand for quick swaps.
- Safety: don’t overload outlets, use proper gauge speaker wire (14 AWG for up to ~50 ft), and secure heavy gear in racks or cabinets.
Projector owners: note lamp/laser hours and clean optics with proper lens cloths only. TV owners: use the panel’s pixel refresh cycles as recommended by the manufacturer.
Common mistakes and easy fixes
Most “underwhelming” theaters share a short list of mistakes—and quick remedies.
- Screen too high: Lower it so your eyes hit the upper third of the image at rest; neck pain disappears and immersion rises.
- Speakers too wide or narrow: Re‑measure your angles. Move the couch or speakers to hit ~45–60° L/R from the main seat; dialogue and pans lock in.
- Single sub in a bad spot: Add a second sub or move the sub along the front wall; even 18 inches can smooth a null.
- Too bright room for a projector: Improve shades and paint, or switch to a TV for daytime viewing.
- Motion smoothing on: Turn it off for films; look for “Filmmaker Mode.”
- Cluttered control: Consolidate to one remote/app and create a “Movie Night” macro.
When in doubt, change one variable at a time and keep notes. A phone photo diary of setup changes makes troubleshooting simple and progress obvious.
Demo scenes and content curation
Great rooms deserve great material. Build a small library of scenes that show off picture, sound, and storytelling so you can evaluate tweaks and wow guests without scrolling for 10 minutes.
Ideas to cover different strengths:
- Dialogue clarity: A quiet, intimate scene where voices sit at the center without hiss or chestiness.
- Bass control: A sequence with tight, deep effects—listen for even pressure across seats without boomy hotspots.
- Atmos immersion: A rain or jungle soundscape where height channels place you inside the world.
- HDR contrast: A starfield or nighttime cityscape where blacks stay black and highlight speculars pop without clipping.
Rotate in new titles regularly. Streaming platforms refresh masters, and disc releases often include improved transfers. Keep a quick‑launch folder of your go‑to clips on your streamer or disc player so “showtime” is one button away.
Quick math and reference tables
Bookmark these bite‑size formulas to make decisions in minutes, not hours.
- Screen size: viewing distance ≈ 1.2× diagonal (4K movies). At 9 ft, target ~90 inches; at 8 ft, ~80 inches; at 11 ft, ~110 inches.
- Speaker angles: L/R ≈ 22.5–30° off center for music, 30–45° for movies; surrounds 90–110°; rear surrounds 135–150°.
- Sub placement: two subs at opposing wall midpoints; alternative is front left + rear right corners for smoother modes.
- Riser depth: seat depth + 6–10 inches for foot clearance; riser height 8–12 inches typical.
- Panel coverage: 20–30% wall area with 2–4 inch thick absorption + diffusion; ceiling cloud above main row.
- HDMI run: passive up to ~15 ft; beyond that, use active optical; always test before drywall.
Print this list and keep it with a tape measure, painter’s tape, and a laser level. Your most powerful tools are often cheap and analog.
Your first movie night plan
Turn the plan into ritual. Create a “Pre‑Show” scene that drops lights to 30%, sets the display to Filmmaker Mode, wakes the AVR, and cues your streamer to a curated folder called “Trailers.” Press one button and let a favorite trailer roll while people take their seats. Then lights down to 5%, shades sealed, phones on silent, and Play. When the credits start, bring lights up to 30% so everyone can find snacks and share reactions while the score lingers.
If you take a weekend to map your room, a weekend to install, and an evening to calibrate, you will feel the upgrade immediately. The screen will feel bigger, sound will snap into focus, and the room will vanish into the story. That is the goal. Everything else is accessorizing.