Whether you are cutting your first short or polishing a festival feature, learning the fundamentals of movie sound design will make your pictures feel bigger, clearer, and more emotionally precise. This guide walks you end to end through how sound is conceived, captured, built, edited, and mixed for film and TV, using battle-tested workflows and practical examples you can apply today. Throughout, we will compare options across budgets, share checklists you can carry to set, and unpack terms that often get muddled so you can collaborate confidently.
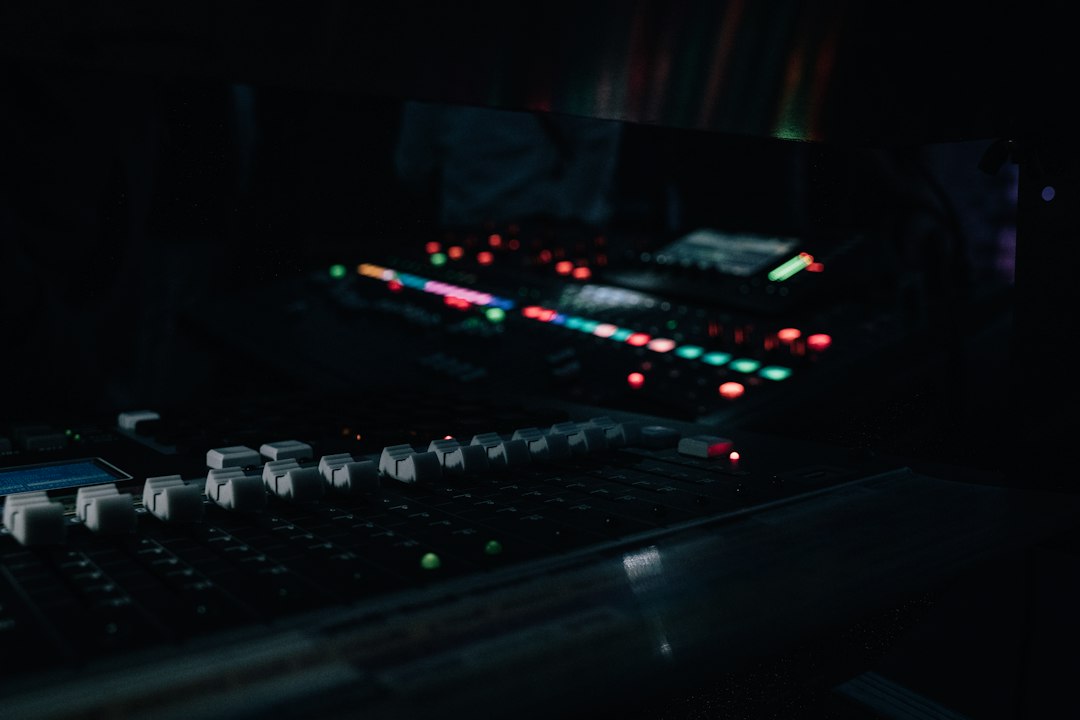
What is movie sound design?
At its simplest, movie sound design is the craft of shaping everything the audience hears so that it supports the story. That includes spoken words, the many kinds of effects and textures that sit under and around those words, and music. But design is more than layering sounds on a timeline. It is the deliberate selection, editing, and balancing of those elements to create perspective, rhythm, and meaning. When a scene cuts from a crowded street to an empty bedroom, the scrape of a chair leg, a distant siren, or the hum of a dim lamp can communicate more than a paragraph of dialogue. Sound design builds that communication.
In modern productions, the term can mean one of two things. Narrowly, the “sound designer” may be the person who invents signature effects, creature voices, or conceptual ambiences. Broadly, “sound design” refers to the entire aural architecture of the film—dialogue, effects, backgrounds, and music—managed by a team. Both uses share a mindset: listening for story cues, choosing what to feature and what to leave out, and shaping dynamics so that the audience’s attention goes where you want it to go.
Three core principles help keep you oriented as you design:
- Clarity: The audience should understand every essential line and action.
- Continuity: Sound should smooth cuts, sell geography, and carry emotion across edits.
- Contrast: Moments of quiet make loud hits more powerful; sparse layers make rich moments feel richer.
Sound department roles and responsibilities
Film sound is teamwork, and understanding who does what helps you schedule, budget, and communicate. Titles vary by country and scale, but these are common roles:
- Production Sound Mixer: Captures dialogue and location sound on set. Manages microphones, recorders, timecode, and RF coordination. Delivers organized sound reports.
- Boom Operator: Places and operates the boom mic, anticipates blocking, negotiates shadows and reflections, and helps hide plant mics.
- Utility Sound Technician: Wires talent with lavaliers, manages batteries, labels tracks, and troubleshoots interference.
- Supervising Sound Editor: Oversees the post sound process, from ingest and dialogue editing to effects building and final delivery. Coordinates with the picture editor and the re-recording mixers.
- Dialogue Editor: Cleans, organizes, and compiles the best production lines. Manages noise reduction, crossfades, and sync for ADR when needed.
- Sound Effects Editor: Builds hard effects (doors, vehicles, tech beeps), design elements, and transitions.
- Foley Team: Records custom footsteps, cloth, and prop movements that match the cut’s sync.
- Re-Recording Mixer(s): Mixes dialogue, effects, and music into the final deliverables (stereo, 5.1, 7.1, Atmos), balancing dynamics and space.
- Music Department: Composer, music editor, and music supervisor who create, cut, and clear score and songs.
On shorts and microbudgets, one or two people might wear many hats. On studio features, each role may be an entire sub-team. The responsibility map is the same either way: get good source sound, organize it carefully, build purposeful layers, and mix for intelligibility and impact.
The four layers of cinematic audio
While there are dozens of subcategories, most film sound boils down to four families. Knowing them clarifies both your track layout and your creative intent:
- Dialogue: The spine of most scenes. Includes production dialogue, ADR, and group walla. Clarity and consistency trump everything.
- Effects: Specific actions (doors, guns, phones, tech), vehicles, impacts, and designed elements that punctuate story beats.
- Ambience/Backgrounds: Continuous textures (wind, traffic, room tone, forest insects) that imply environment and space, connect edits, and shape perspective.
- Music: Score and source (songs playing in-world). Music can anchor pace, define tone, or play against picture for irony.
Think of these as faders on a console. To highlight a line, pull ambiences and music down for air. To sell a location change, ramp the new ambience before picture cuts. To build tension, strip the backgrounds and give the audience a fragile, close-mic’d world where every breath feels exposed. The artistry is in the balance.
Script-to-screen sound workflow
Great sound starts before the first shot. Use this high-level workflow to plan your project, whether you are producing a short doc or an episodic drama:
- Preproduction: Read the script for sound risks (crowded exteriors, stunts, vehicles) and opportunities (montages, POV moments). Scout locations for noise and reflections. Align with the director on a sonic palette and with the picture editor on sample rates and delivery expectations.
- Production: Capture clean dialogue, useful wild tracks, and room tones. Keep sound reports meticulous and back up media daily.
- Editorial Prep: Receive OMF/AAF exports from picture editorial with reference video and the latest locked cut. Conform production audio by timecode; verify pull-up/down and frame rate math.
- Dialogue Editing: Choose best takes, equalize levels shot to shot, perform gentle noise management, and build smooth transitions. Mark ADR candidates and prep concise ADR scripts with handles.
- Effects & Ambiences: Build backgrounds for each location, layer hard effects for actions, and create transitional or emotional design when needed.
- Foley: Record footsteps and props that production sound missed or that need intimate detail.
- Temp Mixes: Share works-in-progress with the director and picture team to test pacing and tone.
- Final Mix: Balance dialogue, effects, and music; shape dynamics; create deliverable stems. Printmasters in required formats (stereo/5.1/Atmos) with proper loudness specs.
- Quality Control & Delivery: Watch the full film in real time, take notes, fix ticks or dropouts, verify lengths and leader specs, then package stems, M&E, and paperwork.
Two tips keep this pipeline healthy: lock picture before heavy sound work, and schedule approvals early so you are never chasing last-minute feedback during mix week.
Capturing production sound on set
The easiest way to improve your final mix is to record cleaner dialogue on set. Even the best noise tools trade artifacts for intelligibility. Focus on source quality:
- Microphone choice: Use a quality shotgun or supercardioid on a boom outdoors, and a supercardioid or hypercardioid indoors to reduce room reflections. Complement with well-placed lavs for wide shots or challenging blocks.
- Placement: Keep the boom as close as framing allows, pointed at the sternum or mouth depending on performance. Hide lavs in clothing with minimal rustle and away from necklaces or beards.
- RF discipline: Scan frequencies, avoid crowded TV bands, and label transmitters and channels.
- Record levels: Set conservative peaks with plenty of headroom. Clipping cannot be repaired, but quiet lines can be raised.
- Room tone and wild lines: Roll 30–60 seconds of room tone per setup, and grab clean wild lines if a take had bumps or overlaps.
- Paperwork: Sound reports should list scene, take, mic type, and notes on issues so post can triage quickly.
On-set checklist you can tape to your cart:
- Timecode jammed to camera and slate? Test at lunch and wrap.
- Frequencies coordinated, spares ready, batteries fresh?
- Wind protection for all exterior mics?
- Clothing loops, moleskin, or Rycote stickies in pocket for quick lav fixes?
- Slate IDs audible at head and tail of complicated takes?
Building effects, foley, and ambience
After dialogue is organized, the richest creative part of sound design begins: making the world breathe. Here is a pragmatic approach:
Ambiences: Build backgrounds first. They glue the cut and set perspective. For each location, layer at least three elements: a bed (air, wind, city wash), local details (distant dogs, specific birds, traffic type), and interiors (room tone with HVAC or fridge hum if story-appropriate). Crossfade backgrounds across cuts to mask hard picture edits. Use EQ to push ambiences “behind” dialogue—often a gentle high-shelf dip and a midrange notch per scene does wonders.
Hard effects: Cut on-screen actions clearly, but do not over-detail every movement. Use short pre-lays to lead the eye into a door close or a phone pickup. For weapons, vehicles, or sci‑fi tech, think in layers: mechanical body, transient sweetener, tail. For creative transitions (dreams, flashbacks), design stingers that match the film’s motif: reversed cymbals for lyricism, tonal risers for anxiety, or filtered location sounds for memory.
Foley: Foley sells intimacy and character. Record footsteps by surface and shoe type, then vary weight and rhythm to reflect emotion. Cloth passes add life to quiet scenes. Props fill gaps production sound missed—coffee cups, paper, keys. Even on low budgets, a few hours of targeted foley for hero moments elevates realism better than libraries alone.
Practical tip: build a palette session where you collect reusable textures and sweeteners that define the project’s identity. Revisit it when you start new sequences so the film stays sonically cohesive.
Dialogue editing and ADR without headaches
Dialogue carries plot and character. The goal is natural, consistent, and intelligible speech that feels like production. A robust workflow looks like this:
- Assembly: Lay out the best production lines, grouped by character, with handles. Remove camera bumps, mic zaps, and obvious rustle with surgical fades before reaching for tools.
- Level & match: Even out take-to-take differences with clip gain, then gentle compression or expansion only when needed. Use matching EQ moves per mic type to keep timbre consistent across angles.
- Noise management: Favor broadband reduction in small doses and spectral repair only for isolated issues. Timing edits and room tone fill often fix as much as algorithms.
- ADR choice: Only replace what truly hurts story: unintelligible words, intrusive noises, or rewritten lines. Guide actors with picture rhythm in mind; capture multiple emotional intensities. Record room tone in the booth too.
- Blend: Match mic proximity, reverb, and background energy so ADR lines sit with production. A touch of slap or convolution of the set’s impulse response can help.
A simple dialogue QC checklist before you hand off to the mix:
- Any clipped consonants, double breaths, or mouth clicks?
- Are off-camera lines plausible in distance and tone?
- Are group walla and crowd beds balanced so they imply life without masking key words?
- Are fades clean—no zipper noises or phasing?
Sound editing vs. sound mixing
These terms are often blurred, but the distinction helps you plan schedules and responsibilities.
Sound editing is building: organizing dialogue, cutting effects, layering ambiences, and preparing sessions for mix. The editor decides what sounds when, what it means for story, and how elements transition across cuts.
Sound mixing is balancing: fine-tuning levels, dynamics, EQ, panning, and reverbs to make the edited materials play together. The mixer shapes perspective—who the audience is “sitting next to”—and ensures compliance with delivery specs. On small projects, one person will do both; on larger shows, they are distinct phases with review loops in between.
When you are both editor and mixer, protect yourself with milestones: a locked edit approval (all elements in place) and then a dedicated mix approval (balances and dynamics). This prevents open-ended iteration from consuming your schedule.
Tools and studio setup on any budget
You can produce competitive work with modest gear if you treat the room and monitor consistently. Consider three tiers:
Entry: A capable laptop, a DAW (Pro Tools, Fairlight, Reaper, or Logic), accurate closed or semi-open headphones, and one pair of reliable nearfield monitors. Add a small audio interface with clean preamps for foley or ADR. Use simple acoustic treatment—reflection filters and broadband absorbers—to control early reflections at the listening position.
Growth: Step up to quieter monitors with better low end, a subwoofer if your room can support it, and room correction or measurement with an inexpensive measurement mic. Expand your plugin set thoughtfully: a transparent noise tool, a dialogue de‑reverb, an intuitive EQ, a dynamics plugin with sidechain, a convolution reverb, and a limiter that respects transients.
Advanced: Build a calibrated 5.1 or immersive system (e.g., Dolby Atmos) in a treated room with bass management. Use a dedicated recorder and a small mic locker (shotgun, hypercardioid, lav packs, stereo pair) to gather custom material. Add a control surface for tactile mix moves and confidence monitors to check different playback conditions.
Regardless of tier, consistency wins: Calibrate listening level, keep session templates organized, and version your projects with clear notes so you (and collaborators) can reproduce decisions months later.
Collaboration, feedback, and storytelling
Sound is narrative. That means you must regularly align with the director, picture editor, and composer to keep story priorities clear.
- Spotting sessions: Watch the cut together and mark opportunities for sound to set POV, sell geography, or bridge time. Agree on where music leads vs. where effects carry the beat.
- Temp reviews: Share short, labeled bounces (e.g., “Reel2_v3_tempFX”) so notes refer to timecode and version numbers. Ask specific questions (“Should the second car pass feel closer?”) to focus feedback.
- Story language: Translate adjectives into actions. “Make it more anxious” can mean “reduce room tone,” “add a thin tonal bed,” or “tighten reverb tails.” Offer options, then lock decisions.
- Composer handshakes: Exchange stems early so effects and score do not trample each other in the same frequency bands.
Great collaborators earn trust by delivering on time, labeling clearly, and explaining choices briefly and calmly. Your job is not just to make sounds; it is to design a listening experience the team believes in.
Deliverables, loudness, and QC for theaters and streamers
Distributors and festivals have specific technical requirements. Plan them early so you are not scrambling on deadline day.
Common deliverables:
- Full mix: Stereo and/or surround (5.1/7.1) printmasters, often with a 2-pop and proper leader.
- Stems: Dialogue, music, and effects (DME) stems that sum to the full mix. For broadcast and localization, these are non-negotiable.
- M&E: Music & Effects only, for foreign-language dubbing. This requires filling production dialogue leakage with backgrounds and foley.
- ADM/Atmos: If required, object-based deliverables with bed and objects, plus appropriate metadata.
- Paperwork: Cue sheets, track sheets, and a delivery manifest.
Loudness varies by medium. Theaters use reference levels calibrated to the room, while streamers and broadcasters specify integrated loudness and true peak targets (e.g., around −24 LKFS for some broadcast, −16 to −14 LUFS for certain streaming contexts, and TP around −2 dBFS; verify current specs with your distributor). Always check the latest tech sheets.
QC checklist for final exports:
- Every reel/episode has 2-pop, correct start time, and tail slate if required.
- Stems null against the printmaster when combined.
- No clipping or unexpected limiting on stems or full mix.
- Channel order matches spec (e.g., 5.1 as L C R Ls Rs LFE or as specified).
- All fades are smooth; no clicks at region boundaries.
- Dialogue is intelligible on consumer speakers and headphones, not just studio monitors.
Career paths, budgets, and practical planning
Many pros arrive in sound from editing, music, or production. The most reliable career path is to become dependable at one core task while staying fluent in the whole pipeline. A few practical notes:
- Build reels and relationships: Cut volunteer projects you can be proud of, but move quickly into modestly paid gigs where expectations and scope are clear. Keep reels short and labeled by role (dialogue, design, mix) so clients see what you actually did.
- Estimate honestly: Break projects into phases (dialogue, ambiences, effects, foley, temp, mix, deliverables) and assign hours to each. Include two review passes. Put scope changes in writing.
- Protect your hearing and schedule: Take breaks; long sessions lead to poor decisions. Monitor at a consistent, safe level so you do not chase loudness.
- Keep learning: Tools change; fundamentals do not. Carve time to study films you admire with a notebook and ask, “What made that transition feel effortless?”
A starter budget template for a short narrative (adapt numbers to your market):
- Dialogue edit: 12–18 hours
- Backgrounds: 8–12 hours
- Effects/design: 12–20 hours
- Foley (targeted): 6–10 hours
- Temp reviews and revisions: 6–12 hours
- Final mix and deliverables: 10–16 hours
Track actual time against estimates and revise your template over the next few projects. Accuracy becomes a selling point.
Quick reference: field and post checklists
Pin or print these lists for the cart and the edit bay.
On‑set essentials:
- Spare batteries, gaffer tape, lav accessories, wind protection
- Headphones with closed isolation and a reliable backup pair
- Timecode cables/adapters and a tentacle or lockit if needed
- Small toolkit: screwdrivers, hex keys, scissors, marker, moleskin
- Silica gel packs and zip bags for rain days
Editorial essentials:
- Session template with color‑coded tracks for DX, FX, BG, MX
- Organized libraries with consistent naming (Door_Heavy_Wood_Close_01.wav)
- Reference monitoring level and a calibrated meter plug‑in
- Versioning scheme (Project_Short_Title_v07_MixTemp.wav)
- Backup plan (onsite and cloud) with daily increments
Mix day rules:
- Start with dialogue only; make it beautiful before adding anything
- Introduce backgrounds sparingly, then carve space with EQ
- Pan effects to picture geography; automate perspective changes
- Keep music dynamic; leave room for breaths and consonants
- Print stems early; they reveal balance problems fast
If you want to explore more articles on production and post, browse the film coverage at Albertini Arts and bookmark useful techniques you can try on your next project.
Practice scene: applying the concepts
Imagine a two‑minute scene: a character returns to a childhood apartment at night, unlocks the door, and finds a box on the table with an old cassette player inside. No dialogue until the final line: “I knew you kept it.”
Ambience plan: Exterior stairwell buzz, distant city wash, a neighbor’s late TV through the wall. Inside, the apartment hum is low and warm; a refrigerator ticks intermittently; the hallway is slightly ringy. As the door opens, the exterior wash fades and the interior tone rises to hug the character.
Effects plan: Keys clink, the deadbolt turns with a tired scrape, the door edge rubs a swollen jamb, hinges groan on opening. The light switch clicks; a fluorescent tube flickers with a nervous, thin buzz. For the cassette player, layer: plastic latch press, lid pop, head assembly click, tape spool spin, and the gentle push of the play button with a felt thunk.
Design plan: As the character sees the player, introduce a faint tonal motif derived from the apartment hum, pitched up a few semitones, to suggest memory surfacing. Pull ambiences down by 2–3 dB to give the moment air; add a subtle plate reverb to the room to make time feel stretched.
Mix moves: Keep the stairwell buzz about −24 to −27 LUFS integrated for the opening seconds; bring the interior bed to −28 LUFS for contrast. Pan creaks to match camera position. On the final line, pull the tonal motif to the background and bring the voice close with a touch of early reflections—not a big tail—so it feels intimate.
Run this scene end to end, then swap choices: what if the fridge hum disappears when the player appears? What if the keys are too bright and signal nervousness? Practicing intentional swaps trains your ear to use contrast.
Common pitfalls and how to avoid them
Even experienced teams fall into these traps:
- Fixing in post: Treat this as a last‑resort fantasy. Push for better source on set; future you will be grateful.
- Over‑detailing: Just because you can cut every cloth rustle does not mean you should. Feature only what helps the audience connect.
- Loudness creep: If you mix louder as the day goes on, your judgment slips. Re‑calibrate ears with pink noise or a reference track every hour.
- Masking the spine: Music and backgrounds are supporting actors. If they hide consonants, they are hurting story.
- Inconsistent deliverables: Mislabeled stems and channel orders derail deliveries. Use checklists and template exports.
When in doubt, pause and ask: “What does the audience need to feel right now?” If a sound does not serve that answer, mute it.
A learning path you can start this week
To build momentum without getting overwhelmed, try this 30‑day ladder:
- Week 1: Calibrate your monitors and organize libraries. Create a starter session template with dialogue, effects, backgrounds, and music routing to print stems.
- Week 2: Re‑cut an old short film’s dialogue with fresh ears. Focus on matching timbre across angles and using room tone fill instead of heavy processing.
- Week 3: Build background beds for two contrasting scenes (exterior day, interior night). Practice crossfades that feel invisible.
- Week 4: Do targeted foley for a one‑minute sequence (footsteps and two hero props). Then mix the scene twice—once dry, once with cohesive reverb—to learn how space changes emotion.
Keep notes on time spent, tools that helped, and what you would do differently next round. Small, repeated projects compound skill fast.
Movie sound design rewards curiosity. Keep listening to the world with a storyteller’s ear, and each scene you finish will sharpen your instincts for the next.